N 51° 17' E 7° 18'
Last modification on
20.06.2010 16:26:54
![]()
www.woelper.net
Astro Equipment
Home
Mountainbiking
Photography
Astronomy
Family Research
Weather
Wiesengrund
Email to Hendrik
Impressum / Disclaimer / Copyright

To my
Astro-Pages:
Photography
Equipment
Projects
Table of content
Hardware
This list contains only the major parts of my astro-equipment:
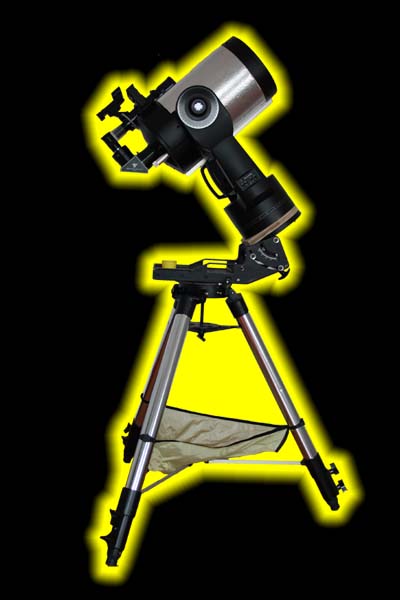
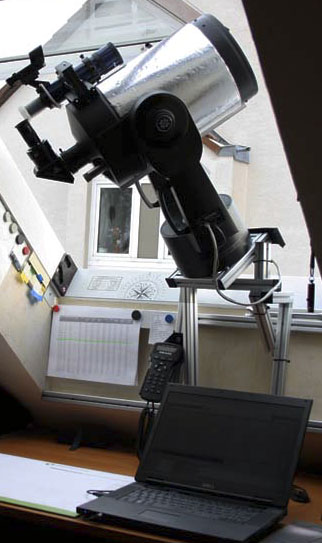
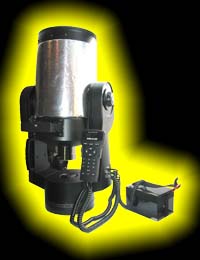
Telescope Meade LX90 8",
a 200 mm aperture and 2000 mm focal length Schmidt-Cassegrain telescope (f/10)
with a heavy tripod and a Celestron polar wedge
2009 I made a changeover to 2" eye-pieces and Bluetooth
The picture on the right show the LX90 with polar wedge and tripod
In a South facing roof-ligth of my home I installed a polar mount , see below
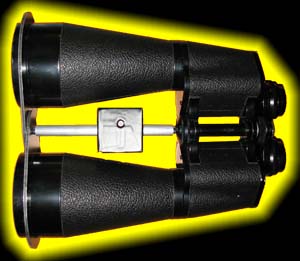
Tordalk 15x80 Binocular made by CBS (Firma C. Beck und Söhne in Kassel) equiped with a diy-tripod-adapter
Meade LPI camera (LPI = Lunar Planetary Imager™), a small webcam with 1 1/4" eye-piece-adapter. (you will find details in the Meade homepage)
Digital reflex camera Canon EOS 1000D (for details please look at the Canon Homepage)
Notebook, Windows XP and several astro programs
Back to topDo it yourself Section
- Polar mount in roof-light
- Laser-mirror for polar alignment
- Adapter-plate for polar wedge
- Camera-Adapter for LX90
- LED-Keyboard-Illumination
- Implantation of a Bluetooth-Adapters into LX90
Whoever would like to know more about these projects may contact myself via Email.
The polar mount in roof-light
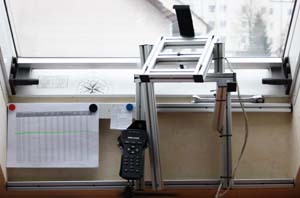 is superb for "instant" telescope observations.
The framework made of 30x30 Item profiles
is a rather strong and stiff structur.
Using special screws and T-Slot nuts it was very easy to build.
Both long horizontal profiles are fastened with very long screws directly to the roof beams.
On the left end of the top profile is a magnetic ruler that holds a checklist and observation plans.
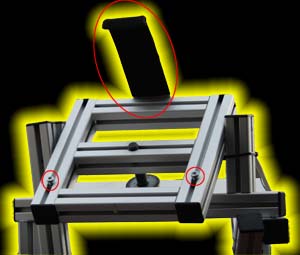
The hook and two screws encircled red are very helpful to install the 30 lb telescope without another helping hand. They hold the LX90 in place until the big center-bolt is tightend. Thereafter the hook is folded aside (see photo on the left).
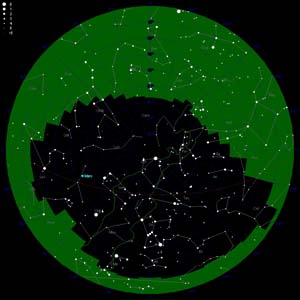
This diagram shows the visible part of the sky seen from the roof-light (the green sections are invisible / below horizon).
Yes, I know that the house under my feet and the other houses around have a negativ effect on the
Seeing ...
but it allows more and "instant observations" compared to 'pack all equipment in the car, drive to a really dark site, unpack and install,
observe, pack into the car again, drive home and unpack once again'.
![]()
Laser-mirror for polar alignment
 Unfortunately I can not see Polaris from the roof-light.
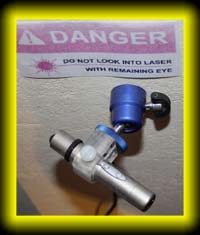
To facilitate an exact "polar alignment" I installed a stationary laser
(one of these cheap keyring lasers which is now connected to a power supply, see photo on the right),
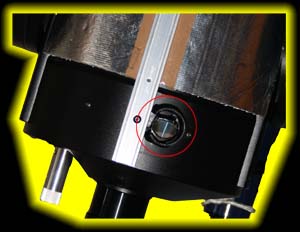
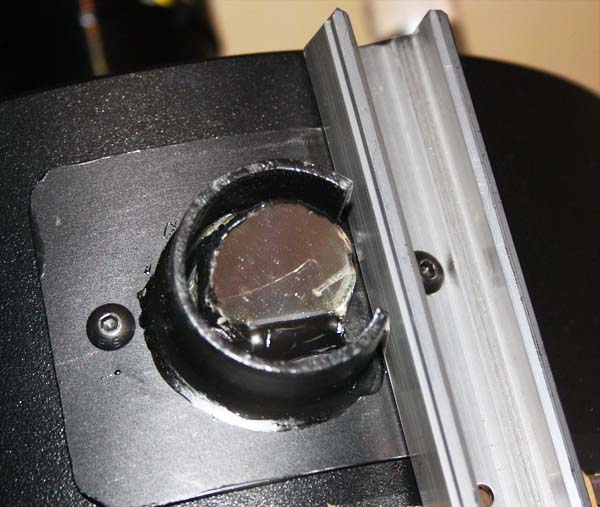
a small laser-mirror attached to the optical tube assembly (= OTA, see picture on the left) and
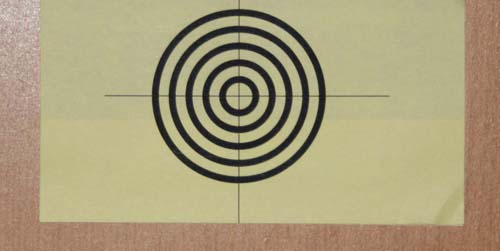
a target on the wall.
In the alignment-start-position (azimuth North, declination 90 °) the laser beam is reflected into the center of the target.
This setup allows a quick and precise alignment.
Unfortunately I can not see Polaris from the roof-light.
To facilitate an exact "polar alignment" I installed a stationary laser
(one of these cheap keyring lasers which is now connected to a power supply, see photo on the right),
a small laser-mirror attached to the optical tube assembly (= OTA, see picture on the left) and
a target on the wall.
In the alignment-start-position (azimuth North, declination 90 °) the laser beam is reflected into the center of the target.
This setup allows a quick and precise alignment.
The laser-mirror shall be planar - I cut one out of an old CD ROM.
It is glued wth 2-k-glue to a black anodised Aluminum plate which itself is fixed to the OTA with screws.
All around the mirror is a plastic tube to protect the mirror (see
here for details).
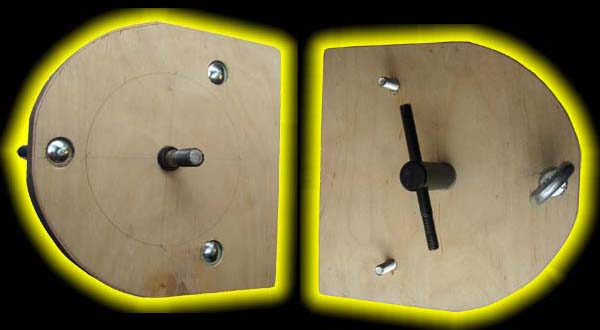
The Adapter-plate
to fasten the Meade LX90 on the Celestron polar wedge is made of thick plywood.
Mushroom head square neck bolts are a good choice, because they will not turn when you tighten the nuts.
Camera-Adapter for LX90
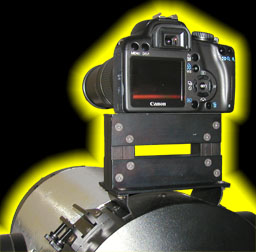
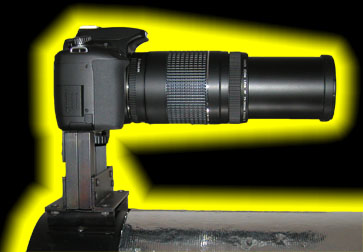
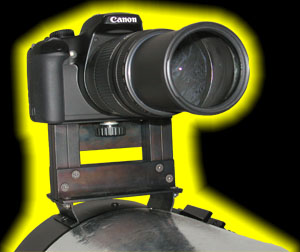
With this adapter made of Alumina-profiles out of my junk box I can piggyback mount my camera on the LX90 for long time exposures.
To reduce reflections and for a stylish look I got these profiles anodised black.
A long and wide seat area ensures a stable connection.
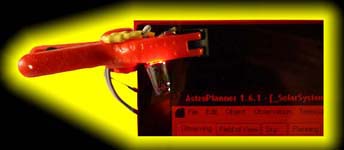
LED-Keyboard-Illumination
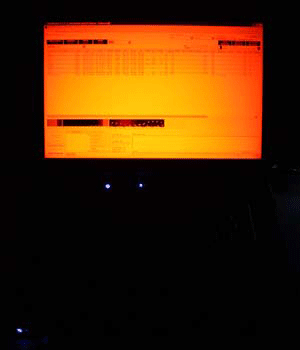
As mentioned above, a notebook is integral part of my astronomic equipment.
For preparation of observation nights and during those I user a program called
AstroPlanner
to control the telescope and log observations.
The photo shows how the monitor brightness is reduced by a red foil (source
Conrad.de).
With this foil the keyboard is so dark, that I can not type any more.
The solution are two red LEDs integrated into the clips I use to fasten the red foil:
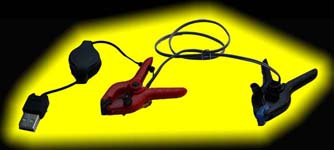
Electric current for the LEDs is draw from an USB-Port (5 V=).
Both LEDs and a resistor are connected in series.
The resistor's value was determined in a pre-test so that the keys are just visible.
Implantation of a Bluetooth-Adapters into LX90
 Usually you control the LX90 with a notebook through a serial cable connected to the Autostar handbox.
In case you get caught in this cable the risk of damage to both, notebook and LX90 is rather high.
Even higher when you have laymen around at a dark site.
The Bluetooth-Adapter GC BT Scope1 Adapter made by Gene Nolan is the solution for this problem.
Usually you control the LX90 with a notebook through a serial cable connected to the Autostar handbox.
In case you get caught in this cable the risk of damage to both, notebook and LX90 is rather high.
Even higher when you have laymen around at a dark site.
The Bluetooth-Adapter GC BT Scope1 Adapter made by Gene Nolan is the solution for this problem.
(see Gene's Homepage).
Once I succeded to get this adapter transmitting data (see Bluetooth-Setup),
I was very pleased with this device. Only the cable spaghetti in the proximity of the telescope was annoying.
To overcome this "problem" I implanted the Bluetooth-Adapter into the left fork arm of the LX90.
Now I need only 3 cables at the LX90: Power input and two data cables between LX90 and handbox as show on the left photo.
![]()
For those of you who would like to do the same the details of this operation are disclosed in
lx90_with_bluetooth_inside.pdf.
Back to top
Download Section
Here you will find documents related to my hobby astronomy for free download.
Astro-Checklist astro-checklist.doc
I use this checklist before and during observation nights.
You may download this Word file and adapt it to your needs.
Bluetooth-connection between telescope and notebook
gc_bt_scope1_setup.pdf
In this file you find instructions how to setup and use the
GC BT Scope1 Adapter by Gene Nolan to connect a LX90 with a Windows notebook.